I decided to model and 3D print a small piece of architecture and then make duplicates using a silicone rubber mould and urethane resin. The main reason advantage of resin casting over 3D printing is speed of duplication. This part took 5 hours to print at medium quality settings. Each cast part takes about 15 minutes.
I found a reference image of a holy well that looked ideal for a stand alone project. I modeled the building in blender. I modeled the door and doorway using basic low poly techniques and then used 3D sculpting to add texture and bricks to the model.
I then 3D printed the model on my Ender3 at medium quality.
I did some clean up on the print with sandpaper, files and a craft knife. This would have been a great time to add some extra damage/depth with a dremel or to add texture using textured paints and sand.
I made a simple mould box from balsa wood and then poured in Oomoo 30 from Smooth On. This is a soft silicone rubber moulding material. Because it has low viscosity, it’s easy for any trapped air to escape, thicker rubbers can result in trapped air bubbles which show up in the final cast. Oomoo 30 takes about 7 hours to harden before it can be used.
Next day I popped the 3D print out of the mould and I was ready to begin making castings using Smooth-Cast 300. This is a urethane resin that sets very quickly. Parts are ready to be pulled out of the mound in about 15 minutes. I made 2 test castings and was very happy to see that both came out very nicely with no air bubbles on the detailed side.
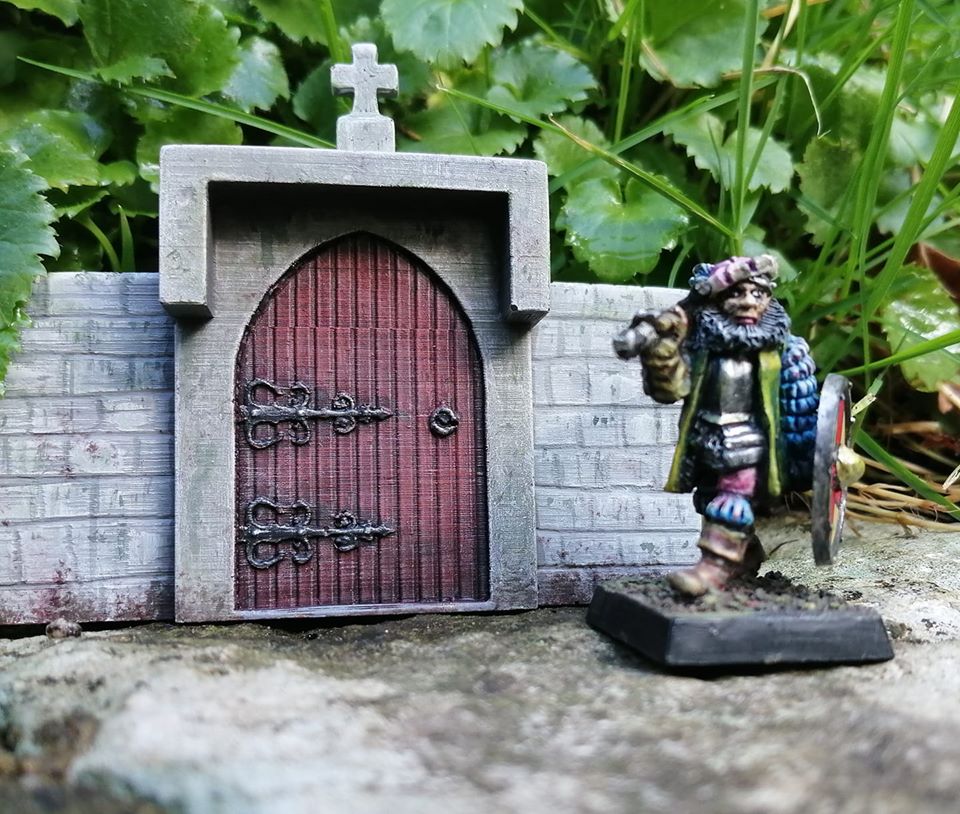
I assembled and painted one of the pieces to see how it looks. I’m quite pleased with how it came out.
I then 3D printed the model on my Ender3 at medium quality.
I did some clean up on the print with sandpaper, files and a craft knife. This would have been a great time to add some extra damage/depth with a dremel or to add texture using textured paints and sand.
I made a simple mould box from balsa wood and then poured in Oomoo 30 from Smooth On. This is a soft silicone rubber moulding material. Because it has low viscosity, it’s easy for any trapped air to escape, thicker rubbers can result in trapped air bubbles which show up in the final cast. Oomoo 30 takes about 7 hours to harden before it can be used.
Next day I popped the 3D print out of the mould and I was ready to begin making castings using Smooth-Cast 300. This is a urethane resin that sets very quickly. Parts are ready to be pulled out of the mound in about 15 minutes. I made 2 test castings and was very happy to see that both came out very nicely with no air bubbles on the detailed side.
I assembled and painted one of the pieces to see how it looks. I’m quite pleased with how it came out.
SlideShow
Summary
If I did another project like this, I would make some of the gaps (for instance around the door frame) larger and I would bevel the edges. I think this would make them easier to print as well as making the mould stronger so it would last longer. I would make the mortar gaps on the walls deeper but I probably wouldn’t add much surface texture to the parts before printing. I think it would work better to add those to the 3d printing before making the mould with a dremel and other tools
You can see the printer slipped halfway through the print. I should have killed the print and done a fresh one with no errors.
Obviously a simple open faced mould like this only creates single sided parts, in the future I want to try a glove mould that will allow for more complex shapes.
The moulding and casting turned out to be very easy and none of the materials smelled bad which was a pleasant surprise.
Seems like a modular approach could create some quite complex buildings from just a few quickly cast parts.
This was fun!
 RSS Feed