Also... fewer stickers please!
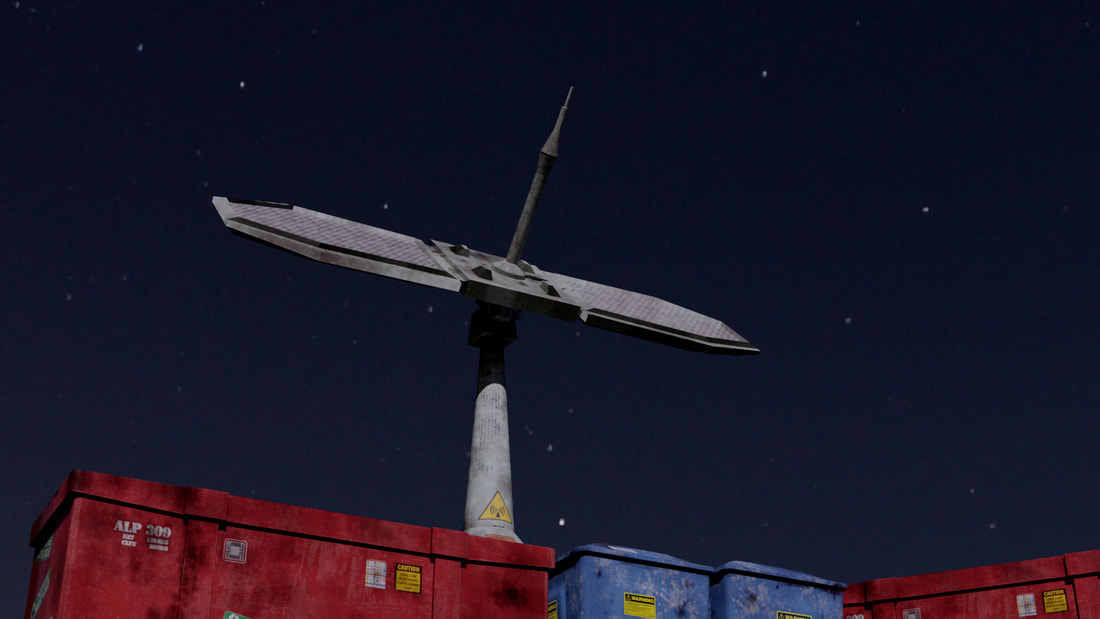
First pass on some dumpsters and a radar tower for the Coffee project. Not that happy with how this stuff looks. Some feedback I got was the materials don't look realistic and are too similar. I'm also concerned that the geometry doesn't really represent what I'm trying to convey. Also... fewer stickers please! 
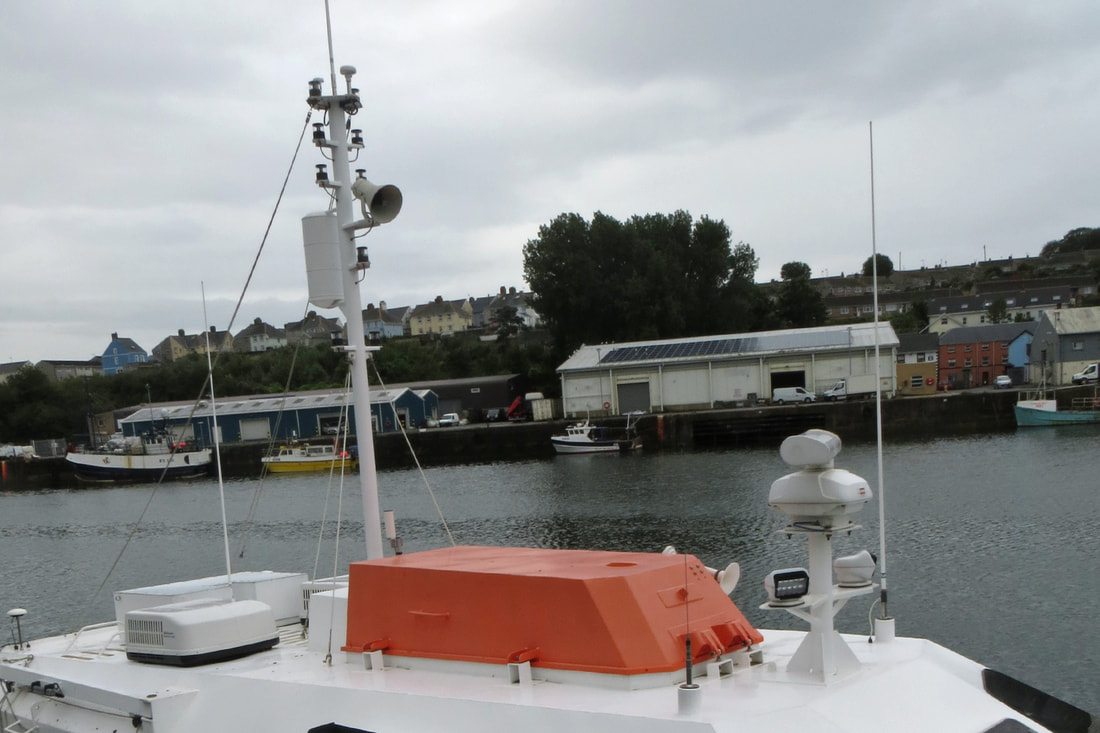
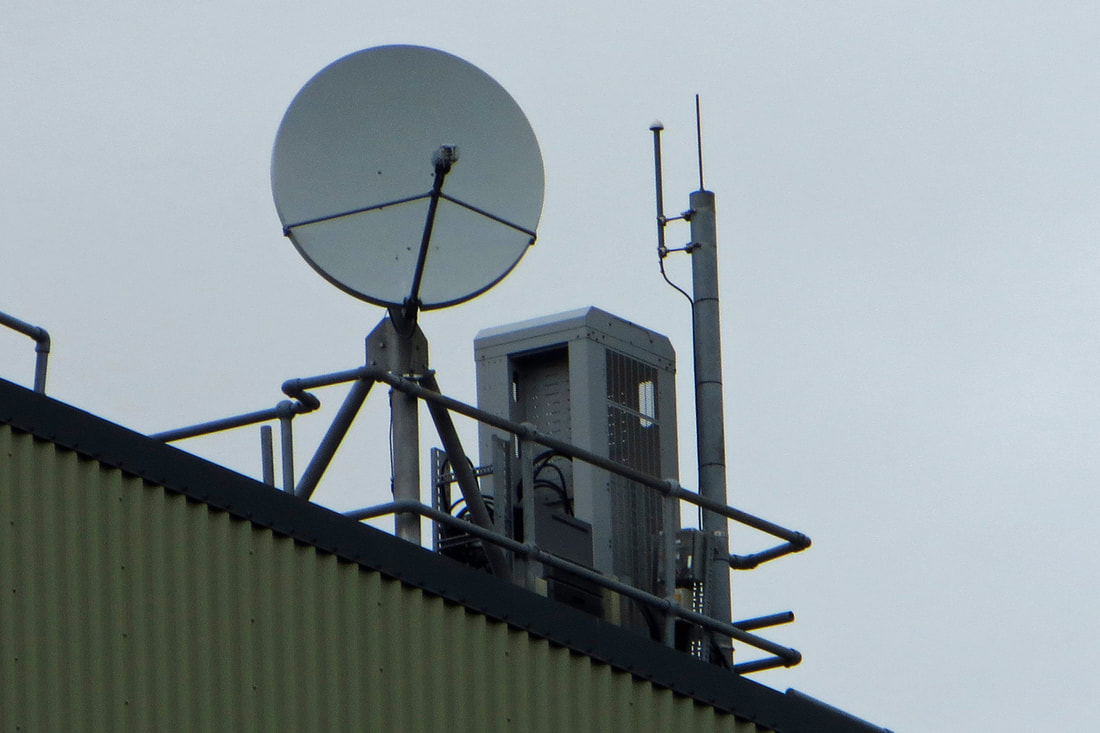
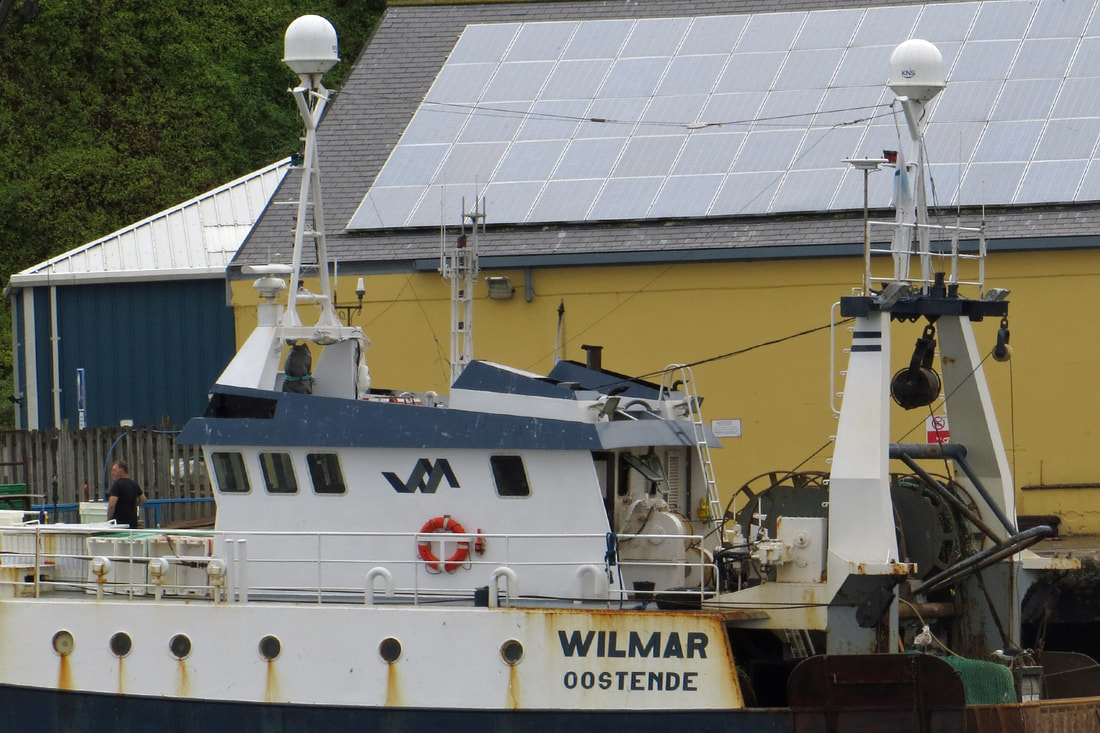
So I went off and took some reference images this morning. Hopefully by trying to get closer to these I can make more convincing looking output. Stat tuned for... better stuff hopefully :-0
0 Comments
Inkscape is an awesome 2D Vector based design tool. It is ideal for creating logos or diagrams as well as designing for laser cutting. Previously I used it to design the laser cut perspex cockpits for the fighter jets used in Barb Hella. It's free to use and you can get it HERE. But for my new "film", I need a fake coffee company logo for "Umberto's Finest Columbian Coffee (Grown on Mars)". I started monkeying around trying to come up with something decent... and stumbled across a tutorial for making Coffee company logos in Inkscape. No Seriously. Literally exactly what I needed. Thanks Internet! I've not updated my blog in age because I've not really done anything technical for ages. In my defense I did move country. I have been doing some stuff in Blender and lately Substance, pictures below. The biplane (its a Sopwith Pup) was for a short I made called Dobson of X Squadron. OK that film is rubbish, I rushed the actual film making because I wanted it done before going away for 10 days, but as proof of concept on the plane, I think I delivered to my expectations. I've also previzzed 2 short films and I very small video game. Just need to get my ass in gear on those. Now I have a decent chair and a decent desk it should be easier to get motivated. That said, I'm still doing this stuff on a puny back to school laptop.
The ChairI got a cheap task chair from Amazon. It's nothing flashy. But I did some upgrades. The last chair I bought was expensive and wasn't really tall enough for me (I'm 6'2"). I realized that I could make it taller by adding a longer gas strut, but because it was a really complex chair with lots of cable operated adjustments removing the seat pan was a big job, so I just replaced the wheels with roller blade wheels. This made the chair instantly an inch taller while reducing wear on my floor. For my new chair I bought a longer gas strut and roller blade wheels before even assembling it. Removing a gas strut from a chair as shown here requires use of a hammer and some brute force, so it's much easier to start with a new chair. The struts and wheels are easily available on Amazon or anywhere that sells office furniture. The struts seem to be a standard size, but the wheels come with several different mounting sizes so make sure you get the right ones. I paid £16 for the wheels and £13 for the gas strut. The basic chair was £46. So that's about 75 pounds for a chair that actually fits me. Standing DeskBack in my NVIDIA days I bought a Varidesk to see if I liked a sit stand arrangement. As I was paying for it myself I didn't want to spend too much money only to find it was a gimmick I didn't like, however I did find that I used it quite a bit. I'd say in a typical office day I would stand about 25% of the time. I found that doing emails and powerpoints was good standing up, but anything like coding or 3D modelling required me to sit down. When I got the Varidesk it was almost the only game in town but now there are dozens of different yet similar desks available. I got the Duronic DM05D17. It moves up and down vertically, where as the Varidesk had more of a cantilever operation. I think the Varidesk used springs and the Duronic uses a gas strut, but apart from that they are very similar. One thing to be aware is that this product doesn't come with the monitor stand as shown in the product image. For good posture you really want your monitor at the right height... The desk was £110. Bargain. Monitor mount I like my monitor mounted high as this forces me to sit upright rather than slumping. I've used all manner of hacks in the past including manuals, books, a bin and even a tupperware container meant for a cake. A check on Amazon showed that you can get proper mounts for not much money these days, so I lashed out on a Von Haus single arm bracket. For £20 how could I not? Fitting the monitor mount to the rising desk was a bit of a hassle. The clamp on the mount was much wider than I needed and as a result the tightening knob was preventing the desk from hitting its lowest point. My solution was to cut the threaded rod down and add a couple of nuts, then tighten the nuts to secure the arm. The arm itself works fine with decent articulation where you'd expect and very little wobble. Other StuffI found a neat little countdown timer extension for Chrome. I set to 45 minutes so that I remember to take a break regularly. I also got new glasses. I seem to be at that age where my eyes get worse all the time. Sucks, but being able to see with glasses is better than not being able to see. Last Thoughts++I'm no ergonomics expert legal disclaimer goes here!! ++ If your back hurts or your eyes or your pee pee, go see a doctor! It's definitely nice to have a comfy set up. Its also nice that it didn't break the bank. I was working on a project last week for just a couple of days and could really feel the negative effects on my back. Hopefully this new setup will let me work for longer with fewer negative impacts.
|
David CoombesMaking stuff Categories
All
Archives
February 2024
|