3D Printing Materials Test

One of the goals of my h2o project is to convert images into height maps which can be used to generate 3d printed objects. A potential application for this technology is custom jewelry.
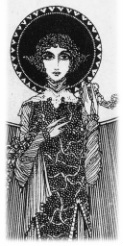
I decided to try and take an extract from an image by Harry Clarke and print it in a range of 3d materials to get a feel for the quality. This helps me understand what the appropriate resolution and depth settings are to get a quality print that people would enjoy.
I decided to try and take an extract from an image by Harry Clarke and print it in a range of 3d materials to get a feel for the quality. This helps me understand what the appropriate resolution and depth settings are to get a quality print that people would enjoy.
Results

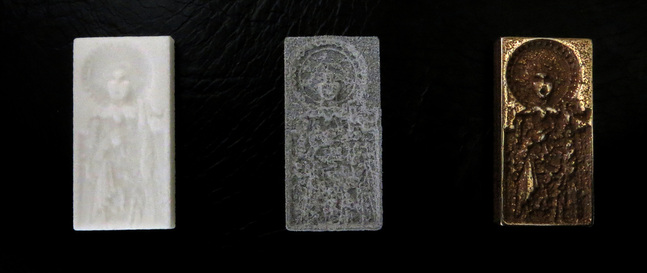
My first couple of attempts were rejected by technical support at Shapeways for being to fragile. I progressively made the model thicker and reduced the contrast of the image to get to a point where they were confident I would get a good print. It's a frustrating process because of the delay between ordering and getting rejected. Another of the goals of h2o is to reduce the number of rejections by allowing me a better view of my model before submitting.
- White Strong & Flexible $2.86
- Alumide $3.20
- Stainless Steel $13.78
Commentary on the Results
White Strong & Flexible
The white plastic is hard to see, I think in future I will order these parts in the same material but grey as it is easier to work see and photograph. It has a slightly sugary texture and seems to have picked up the details quite well. It isn't polished, as polishing would destroy most of the detail. Anyway it was cheap, so its suitable for testing. You can see more of the robe in this one that the stainless one.
Alumide
This was the most disappointing print. The detail retention is poor and the surface texture is extremely porous. I may try polishing it at a later date.
Stainless Steel
The steel print is actually quite nice. It has a weighty feel to it and looks like silver. The polishing has created a 2 tone effect where the high spots are buffed to a mirror finish and the low sports have a rough and therefore less reflective texture which is exactly the effect I was looking for. This effect could be emphasized by using a stain or paint inlay to increase the contrast.
However clearly the resolution of the input image exceeds the capabilities of the printer and perhaps it wasn't a good design to start with because of the high contast in areas like the robe.
I will do some adjustments and resubmit the data. Having h2o will hopefully make this process more intuitive and dare I say it, fun!
Stay tuned!
